Checking the mail log and queue (APEX Mail #7)
As announced, here you will find most of what you need to know about sending e-mails with Oracle APEX. Let's continue with topic number seven.
#7 Checking the mail log and queue
In this blog post we would like to show you how to check which mails are in the queue, which ones have been sent successfully or if an error occurred while sending.
Let´s start by creating (or modifying) a demo app
To avoid having to create a new application again, let's take the demo app from the previous blog post.
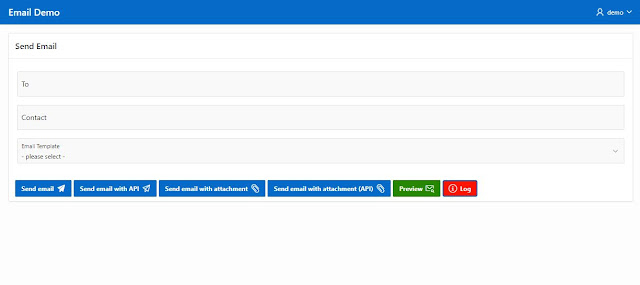
First, we add another button on page 1, which then opens a modal dialog to display the log. So add a "Text and Icon (Hot)" button at the "Help" position. Name the button "LOG" and use, for example, "fa-info-circle-o" as the icon and "Log" as the label. If you want, set the type to "Danger" to make the button stand out. Finally, set "Action" to "Redirect to Page in this Application" and set "Target Page" to Page "3".
If you start the application now, it should look like this.
Create a new page to display the mail log
Next, we need a new page to display the mail log when we click the "LOG" button. So, click on "Create page" in the APEX-Builder and select "Report" and "Interactive Report" as page type. Set the page number to "3" and name it "Mail Log" for example. The page mode could be a "modal dialog", but choose what you want here. Navigation is not required, so don't create a new entry here. Finally, change the source type to "SQL Query" and enter the following SQL statement:
select * from apex_mail_log order by last_updated_on desc;
"APEX_MAIL_LOG" is a predefined view from which all mail activities can be read. The following attributes can be selected:
After the report page is created, duplicate the interactive report. Change the title to "Mail Queue" and enter the following SQL query as "Source":
select * from apex_mail_queue order by last_updated_on desc;
"APEX_MAIL_QUEUE" is also a predefined view from which all mails that are in the queue can be read. The following attributes can be selected:
So there you have it. Let's try to view the email log.
In the following screenshot, an error was produced due to an invalid email recipient. So you can see if and why an error was raised.
Note:
- The queue view is normally empty unless just before the queue was purged or an error occurred.
- Now and then APEX will purged logs. If you want to avoid that, you will have to write logs into a separate table e.g. every night.
Optional
- If you have chosen a modal dialog you can activate "Stretch to Fit Window" under Template-Options for a larger overview
- For instance, "Collapsible" can be selected as the template for the interactive reports
But style the page according to your wishes :)
Quellen:
- https://bit.ly/3njZtKP


0 Comments:
Post a Comment
Note: Only a member of this blog may post a comment.
Subscribe to Post Comments [Atom]
<< Home