Social Sign-In Authentifizierung mit Oracle APEX

In diesem Blog-Post wollen wir an dem vorherigen ansetzen und uns das seit der Oracle APEX Version 18.1 zur Verfügung stehende Authentifizierungsschema „Social-Sign-In“ anschauen.
Mit diesem neuen Schema Typ wird es Anwendern möglich sein, sich z.B. über Ihren Google oder Facebook Account an einer Oracle APEX Anwendung anzumelden. Dieses Feature wird dann interessant, wenn eine Anwendung im Internet zur Verfügung stehen soll, die von einer unbestimmten Anzahl an Anwendern benutzt werden kann und ohne administrative Benutzereingrenzungen zur Verfügung steht.
Perfekt kombinierbar mit dem im vorherigen Blog erwähnten Custom Authentication Scheme.
Perfekt kombinierbar mit dem im vorherigen Blog erwähnten Custom Authentication Scheme.
Um das neue Feature nutzen zu können, müssen wir als Entwickler zunächst ein neues Projekt/eine neue App vom gewünschten Anbieter erstellen. Dieser muss über das OAuth 2.0 Protokoll verfügen. Anschließend muss in APEX ein entsprechendes Web-Credential erstellt werden, sowie ein neues Authentifizierungsschema.
Demnach müssen folgende Schritte immer durchgeführt werden, egal über welchen Dienst:
- OAuth 2.0 Projekt/App erstellen
- Web Credentials erstellen
- Authentication Scheme erstellen
Nachfolgend werden wir bespielhaft Authentifizierungen über Google, Facebook, LinkedIn und Microsoft durchgehen und zeigen wie man alle Authentifizierungen in einer App verwenden kann.
Google
Um einen „Google Sign-In“ anzulegen benötigen wir als erstes ein neues Google Projekt. Hierzu mit einem aktiven Google Account unter console.developers.google.com anmelden und ein neues Projekt erstellen. Dem Projekt geben wir einen eindeutigen Namen wie beispielsweise APEX Login.

Jetzt zum Abschnitt „OAuth-Zustimmungsbildschirm“ wechseln und „extern“ auswählen und „erstellen“ klicken. Bei „Name der Anwendung“ den Namen des Projektes eintragen und die richtige Domain in das Feld Autorisierte Domain eintragen.
Dieses Beispiel bezieht sich auf eine APEX-Anwendung, die in der Oracle Cloud erstellt wurde.
- rf0vpurtyuaq9ko-therwix.adb.eu-frankfurt-1.oraclecloudapps.com
Der Link zur Startseite der Anwendung wäre dann die APEX App:
- https://rf0vpurtyuaq9ko-therwix.adb.eu-frankfurt-1.oraclecloudapps.com/ords/f?p=social
Wer möchte, kann optional noch ein Logo hinzufügen.
Als nächstes unter Anmeldedaten "Neue Anmeldedaten" erstellen und als Typ "OAuth-Client-Id" auswählen. Anschließend den Anwendungstyp auf Webanwendung einstellen und einen beliebigen Namen eingeben (z.B. APEX). Zuletzt noch die Weiterleitung´s URI eingeben.
In unserem Beispiel lautet diese:
- https://rf0vpurtyuaq9ko-therwix.adb.eu-frankfurt-1.oraclecloudapps.com/ords/apex_authentication.callback

Final erhalten wir die für APEX benötigte Client-ID und den Client Schlüssel.

An dieser Stelle wäre der erste Schritt geschafft und wir können in APEX die Webcredentials erstellen. Hierzu im App Builder > Workspace Utilities > Web Credentials neue Credentials über den "Create" Button erstellen.
Folgende Attribute müssen gesetzt werden:
- Name: Google
- Static Identifier: Google
- Authentication Type: Basic Authentication
- Client ID or Username: Client-ID aus den OAuth Zugangsdaten des Google Projekts
- Client Secret or Password: Clientschlüssel aus den OAuth Zugangsdaten des Google Projekts
- Verify Client Secret or Password: erneute Eingabe des Clientschlüssel´s

Anschließend "Apply Changes" zum erstellen der Web-Credentials klicken.
Zuletzt zu den Shared Components der APEX-Anwendung wechseln und ein neues Authentication Scheme vom Typ Social Sign-In mit dem Authentication Provider Google und den vorher definierten Webcredentials erstellen (Credential Store).
Als Scope profile,email und bei Username Attribute email eintragen.

Ab jetzt erfolgt die Anwendungsauthentifizierung über Google :-)
Um ein Login über Facebook zu ermöglichen, gehen wir erneut die 3 eingangs erwähnten Schritte durch. Zunächst benötigen wir eine Facebook App die wir unter developers.facebook.com erstellen können. Als Namen verwneden wir beispielsweise wieder APEX_Login.

Jetzt muss ein Programmtyp ausgewählt werden. Da wir einen Login über Facebook realiseren wollen, wählen wir "Facebook Login" aus und als Plattform für die neue App "Web".

Als nächstes noch die URL der APEX-Anwendung eingeben (in unserem Beispiel lautet diese https://rf0vpurtyuaq9ko-therwix.adb.eu-frankfurt-1.oraclecloudapps.com/ords/f?p=social) und den Rest mit weiter durchklicken.

Unsere Facebook App ist jetzt angelegt, bedarf jedoch noch weiteren Einstellungen. Als erstes unter Facebook Login > Einstellungen die OAuth Redirect URI unserer Anwendung eintragen. In unserem Beispiel lautet diese (genau wie bei Google auch) "https://rf0vpurtyuaq9ko-therwix.adb.eu-frankfurt-1.oraclecloudapps.com/ords/apex_authentication.callback".

Unter Einstellungen > Allgemeines noch die App-Domain, unter denen die APEX-Anwendung erreichbar ist, eintragen (ebenfalls wie auch bei Google lautet diese: rf0vpurtyuaq9ko-therwix.adb.eu-frankfurt-1.oraclecloudapps.com) und die App-Id und den App-Key speichern (wird für die Web-Credentials benötigt).

Facebook
Um ein Login über Facebook zu ermöglichen, gehen wir erneut die 3 eingangs erwähnten Schritte durch. Zunächst benötigen wir eine Facebook App die wir unter developers.facebook.com erstellen können. Als Namen verwneden wir beispielsweise wieder APEX_Login.

Jetzt muss ein Programmtyp ausgewählt werden. Da wir einen Login über Facebook realiseren wollen, wählen wir "Facebook Login" aus und als Plattform für die neue App "Web".

Als nächstes noch die URL der APEX-Anwendung eingeben (in unserem Beispiel lautet diese https://rf0vpurtyuaq9ko-therwix.adb.eu-frankfurt-1.oraclecloudapps.com/ords/f?p=social) und den Rest mit weiter durchklicken.
Unsere Facebook App ist jetzt angelegt, bedarf jedoch noch weiteren Einstellungen. Als erstes unter Facebook Login > Einstellungen die OAuth Redirect URI unserer Anwendung eintragen. In unserem Beispiel lautet diese (genau wie bei Google auch) "https://rf0vpurtyuaq9ko-therwix.adb.eu-frankfurt-1.oraclecloudapps.com/ords/apex_authentication.callback".

Unter Einstellungen > Allgemeines noch die App-Domain, unter denen die APEX-Anwendung erreichbar ist, eintragen (ebenfalls wie auch bei Google lautet diese: rf0vpurtyuaq9ko-therwix.adb.eu-frankfurt-1.oraclecloudapps.com) und die App-Id und den App-Key speichern (wird für die Web-Credentials benötigt).

Jetzt haben wir alle Einstellungen unserer Facebook-App vorgenommen und können zum nächsten Schritt wieder zum APEX-Workspace wechseln.
Anschließend "Apply Changes" zum erstellen der Web-Credentials klicken.

Als Scope public_profile, email und bei Username Attribute name eintragen.

Jetzt kann die Anwendungsauthentifizierung über Facebook erfolgen.


Dort unter App Builder > Workspace Utilities > Web Credentials neue Credentials für Facebook erstellen.
Folgende Attribute müssen gesetzt werden:
- Name: Facebook
- Static Identifier: Facebook
- Authentication Type: Basic Authentication
- Client ID or Username: Client-ID aus den OAuth Zugangsdaten der Facebook App
- Client Secret or Password: Clientschlüssel aus den OAuth Zugangsdaten der Facebook App
- Verify Client Secret or Password: erneute Eingabe des Clientschlüssel´s
Anschließend "Apply Changes" zum erstellen der Web-Credentials klicken.

Zuletzt zu den Shared Components der APEX-Anwendung wechseln und ein weiteres Authentication Scheme vom Typ Social Sign-In mit dem Authentication Provider Facebook und den vorher definierten Webcredentials erstellen (Credential Store).
Als Scope public_profile, email und bei Username Attribute name eintragen.

Jetzt kann die Anwendungsauthentifizierung über Facebook erfolgen.
Microsoft Azure
Unter https://portal.azure.com/ eine neue App registrieren und der App einen aussagekräftigen Namen (zum Beispiel APEX_Login) geben.
Als Redirect URI muss die APEX Callback URI eingegeben und "Web" ausgewählt werden.
- https://rf0vpurtyuaq9ko-therwix.adb.eu-frankfurt-1.oraclecloudapps.com/ords/apex_authentication.callback
Mit klick auf register die App fertigstellen.

Unter Certificates & secrets muss jetzt noch der Clientschlüssel erstellt werden.
Hier kann noch die Gültigkeitsdauer ausgewählt und eine Beschreibung eingegeben werden.

Um Microsoft Azure nutzen zu können ist bereits alles getan. Den Secret Key speichern und unter Overview noch die App-Id abspeichern. Dann wieder zum APEX Workspace wechslen und als nächstes die Webcredentials erstellen (App Builder > Workspace Utilities > All Workspace Utilities > Web Credentials).
Hier wieder einen Namen, Static Identifier und die App-Id sowie den Clientschlüssel eingeben.

Anschließend in den Shared Components der APEX-Anwendung ein weiteres Authentication Scheme erstellen.
Folgende Attribute müssen gesetzt werden:
- Name: Microsoft
- Scheme Type: Social-Sign-In
- Credential Store: Microsoft (zuvor definierte Web-Credential Name)
- Authentication Provider: OpenId Connect Provider
- Discovery URL: https://login.microsoftonline.com/common/v2.0/.well-known/openid-configuration
- Scope: email
- Username Attribute: email

Fertig, ab jetzt können wir uns über einen Microsoft Account anmelden.
LinkedIn
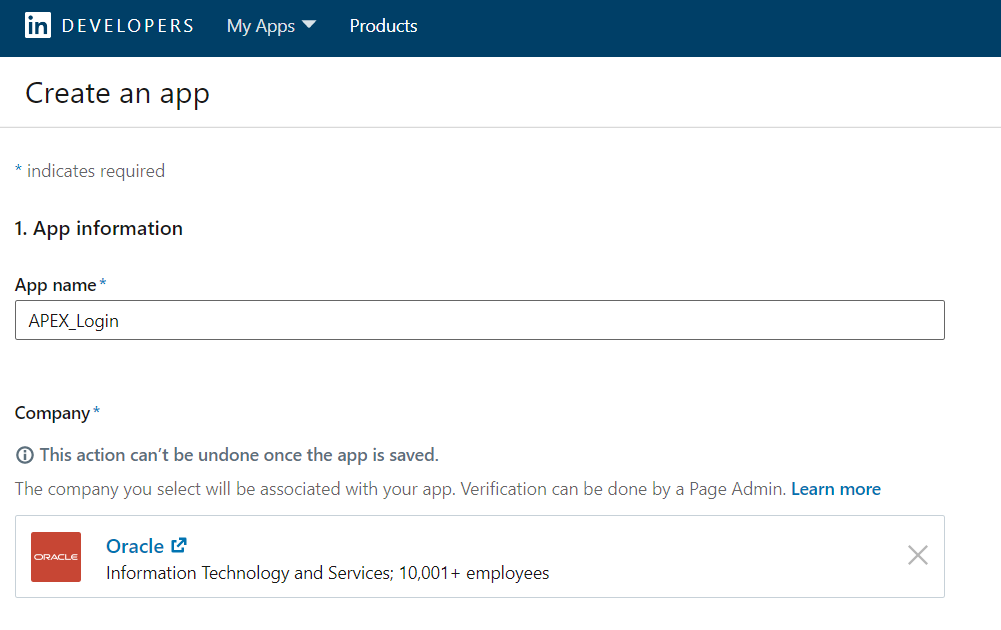
Kommen wir zum letzten Beispiel "LinkedIn". Wie jedes mal benötigen wir zunächst eine App. Dazu müssen wir in diesem Fall unter https://www.linkedin.com/developers/ eine neue App erstellen und der App wieder einen aussagekräftigen Namen (zum Beispiel APEX_Login) geben. Zusätzlich muss hier ein Logo hinzugefügt werden, sowie ein Unternehmen ausgewählt werden.
Abschließend noch die AGB´s bestätigen und die App erstellen.
Nach erfolgreicher Erstellung zum Tab "Auth" wechseln und als Redirect URL die APEX Callback URL eingegeben.
- https://rf0vpurtyuaq9ko-therwix.adb.eu-frankfurt-1.oraclecloudapps.com/ords/apex_authentication.callback

Client-Id und Client Secret wieder speichern, da wir diese im nächsten Schritt für unsere Web-Credentals in APEX benötigen. Fertig ist unsere LinkedIn App, so dass wir nun zum APEX Workspace wechseln können.
Hier als nächstes wieder die Webcredentials erstellen (App Builder > Workspace Utilities > All Workspace Utilities > Web Credentials).
Folgende Attribute eingeben
- Name: LinkedIn
- Static Identifier: LinkedIn
- Authentication Type: OAuth2 Client Credential Flow
- OAuth Scope: r_liteprofile
- Client ID or Username: Client-ID aus den OAuth Zugangsdaten der Facebook App
- Client Secret or Password: Clientschlüssel aus den OAuth Zugangsdaten der Facebook App
- Verify Client Secret or Password: erneute Eingabe des Clientschlüssel´s
und erstellen klicken.

Jetzt noch in den Shared Components der APEX-Anwendung ein neues Authentication Scheme vom Typ Social Sign-In erstellen. Dieses mal müssen allerdings einige Attribute zusätzlich gesetzt werden. Vielen Dank an Christian Neumueller für die ausführliche Erklärung.
Folgende Attribute müssen gesetzt werden:
- Name: LinkedIn
- Scheme Type: Social-Sign-In
- Credential Store: LinkedIn (zuvor definierte Web-Credential Name)
- Authentication Provider: Generic OAuth2 Provider
- Authorization Endpoint URL: https://www.linkedin.com/oauth/v2/authorization
- Token Endpoint URL: https://www.linkedin.com/oauth/v2/accessToken
- User Info Endpoint URL: https://api.linkedin.com/v2/emailAddress?q=members&projection=(elements*(handle~))
- Scope: r_liteprofile,r_emailaddress
- Username Attribute: elements[1]."handle~".emailAddress

Geschafft! Auch LinkedIn kann jetzt als Anwendungsauthentifizierung verwendet werden.
Mehrere Autentication Schemes´s in einer App
Zu guter Letzt noch die Frage, wie wir jetzt alle Authentifizierungen in einer Anwendung zur Verfügung stellen können? Auch hier bietet APEX wieder eine komfortable Antwort!
--> Switch in Session
Ganz einfach in jedem Authentication Scheme unter "Login Processing" die Auswahl bei Switch in Session auf "Enabled" setzen.

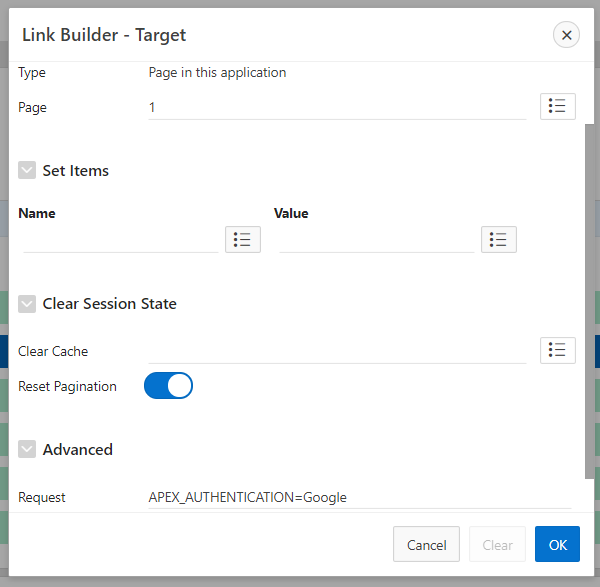
Allerdings muss jetzt noch in der Anwendung selbst ein Request hinterlegt werden, der das gewünschte Schema auswählt. Fügt hierzu auf der Login Seite für jede Authentifizierung einen neuen Button hinzu und gebt folgende Eigenschaften ein (Beispiel Google):
Button Name: Google
Label: Log in with Google
Button Template: Text with Icon
CSS Classes: google
Icon: fa-google
Action: Redirect to Page in this Application
Target: Page 1 (oder eure Startseite der App)
Request: APEX_AUTHENTICATION=Google
Optional kann der Button mit ein wenig CSS Code noch farblich angepasst werden:
.google {
background: #e60005 !important;
color: white !important;
}
Mit allen weiteren Authentifizierungen gleich verfahren.
Falls man sich zu den Social-Sign-In Möglichkeiten auch noch weiterhin über E-Mail und Kennwort Eingabe einloggen können soll, muss das von APEX Standard erstellte Authentication Scheme auf "current" gesetzt sein (oder alternativ ein Custom Scheme). Somit besteht primär die Möglichkeit sich über E-Mail & Kennwort anzumelden und zusätzlich über die verschiedenen Social-Sign-In´s. Perfekt zum Beispiel für ein Web-Shop, eine Umfrage oder ähnliches.
Falls man sich zu den Social-Sign-In Möglichkeiten auch noch weiterhin über E-Mail und Kennwort Eingabe einloggen können soll, muss das von APEX Standard erstellte Authentication Scheme auf "current" gesetzt sein (oder alternativ ein Custom Scheme). Somit besteht primär die Möglichkeit sich über E-Mail & Kennwort anzumelden und zusätzlich über die verschiedenen Social-Sign-In´s. Perfekt zum Beispiel für ein Web-Shop, eine Umfrage oder ähnliches.
Fertig ist der Login und das mit keiner einzigen notwendigen Zeile Code. 100% LowCode!!!
Hier geht´s zu unserer Demo App: demo
Quellen:


